Scheduling Metaflow Flows with Argo Workflows
Argo Workflows is a Kubernetes-native workflow orchestrator - you can read Argo Workflows documentation to learn all about it. If you just want to get your flow in production, this document contains everything you need to know.
In Metaflow's point of view, the main benefits of Argo Workflows are the following:
- As of today, Argo Workflows is the only production orchestrator supported by Metaflow that supports Metaflow's event-triggering functionality through Argo Events. For many users, this by itself is the main reason for choosing Argo Workflows.
- Argo Workflows orchestrates workflows expressed as directed acyclic graphs. This means that we can map Metaflow flows to the corresponding Argo Workflows Workflow Template fully automatically. This gives you much more detail about what gets executed and how, in contrast to treating Metaflow scripts as black boxes.
- Argo Workflows comes with tooling that is required for running workflows in production. You can benefit from battle-hardened solutions provided by the Kubernetes community for alerting, monitoring, and scheduling. By using Argo Workflows your Metaflow flows can integrate seamlessly with the wider Kubernetes offerings.
When running on Argo Workflows, Metaflow code works exactly as it does locally: No
changes are required in the code. All data artifacts produced by steps run on Argo
Workflows are available using the Client API. All tasks are
run on Kubernetes respecting the @resources decorator, as if the @kubernetes
decorator was added to all steps, as explained in Executing Tasks
Remotely.
This document describes the basics of Argo Workflows scheduling. If your project involves multiple people, multiple workflows, or it is becoming business-critical, check out the section around coordinating larger Metaflow projects.
You can interact with Argo Workflows programmatically using the Deployer API - read
more about it here.
Pushing a flow to production
Let's use the flow from the section about parameters as an example:
from metaflow import FlowSpec, Parameter, step

class ParameterFlow(FlowSpec):
    alpha = Parameter('alpha',
                      help='Learning rate',
                      default=0.01)

    @step
    def start(self):
        print('alpha is %f' % self.alpha)
        self.next(self.end)

    @step
    def end(self):
        print('alpha is still %f' % self.alpha)

if __name__ == '__main__':
    ParameterFlow()
Save this script to a file parameter_flow.py. To deploy a version to Argo Workflows,
simply run
python parameter_flow.py --with retry argo-workflows create
This command takes a snapshot of your code in the working directory, as well as the version of Metaflow used and exports the whole package to Argo Workflows for scheduling.
It is highly recommended that you enable retries when deploying to Argo Workflows, which you can do easily with --with retry as shown above. However, make sure that all your steps are safe to retry before you do this. If some of your steps interact with external services in ways that can't tolerate automatic retries, decorate them with retry with times set to zero (times=0) as described in How to Prevent Retries.
The command will export your workflow to Argo Workflows as a workflow template. You can also search for the workflow template by name within the Argo Workflows UI.
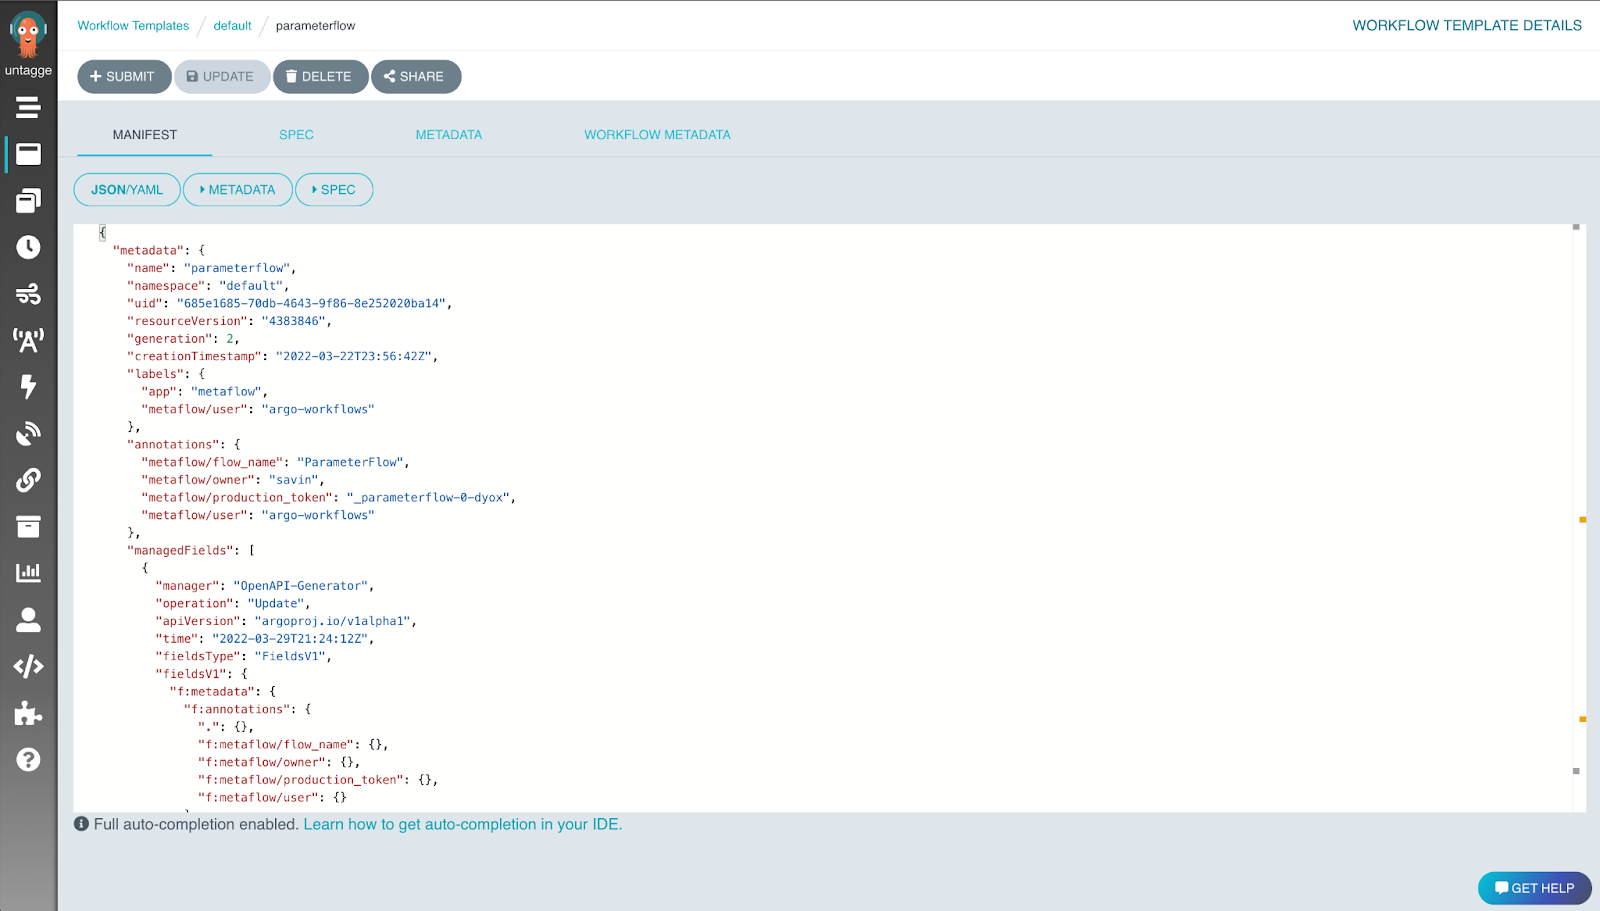
You can click on Submit new workflow to submit your generated Workflow Template for execution

Metaflow automatically maps Parameters of your flow to corresponding parameters on Argo Workflows.
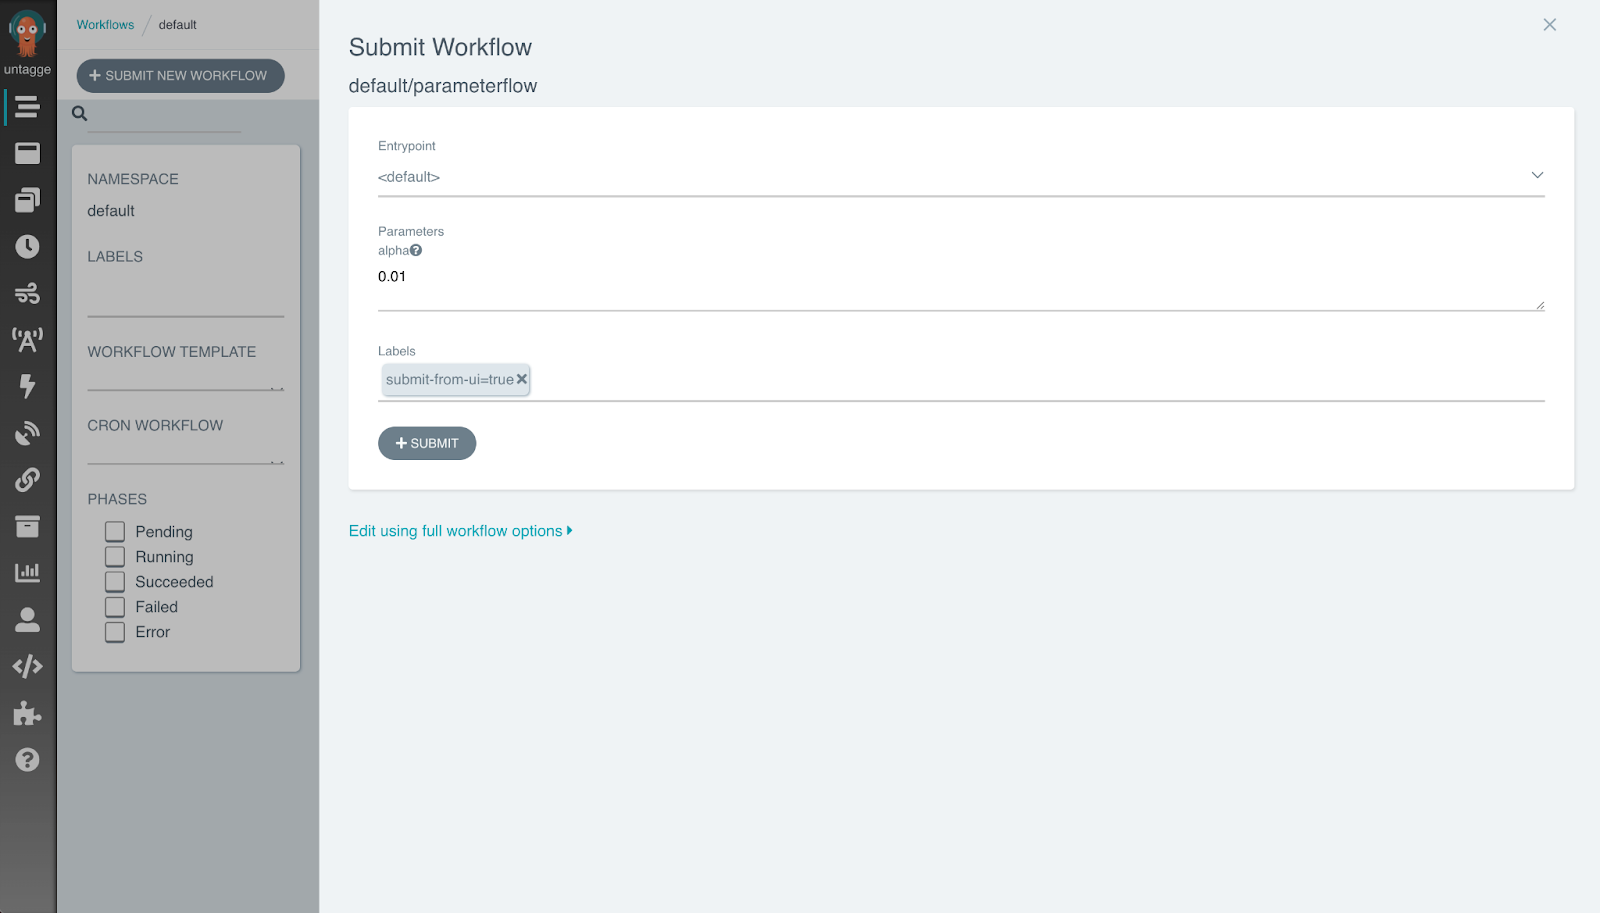
After you click Submit, Argo Workflow starts running the flow:
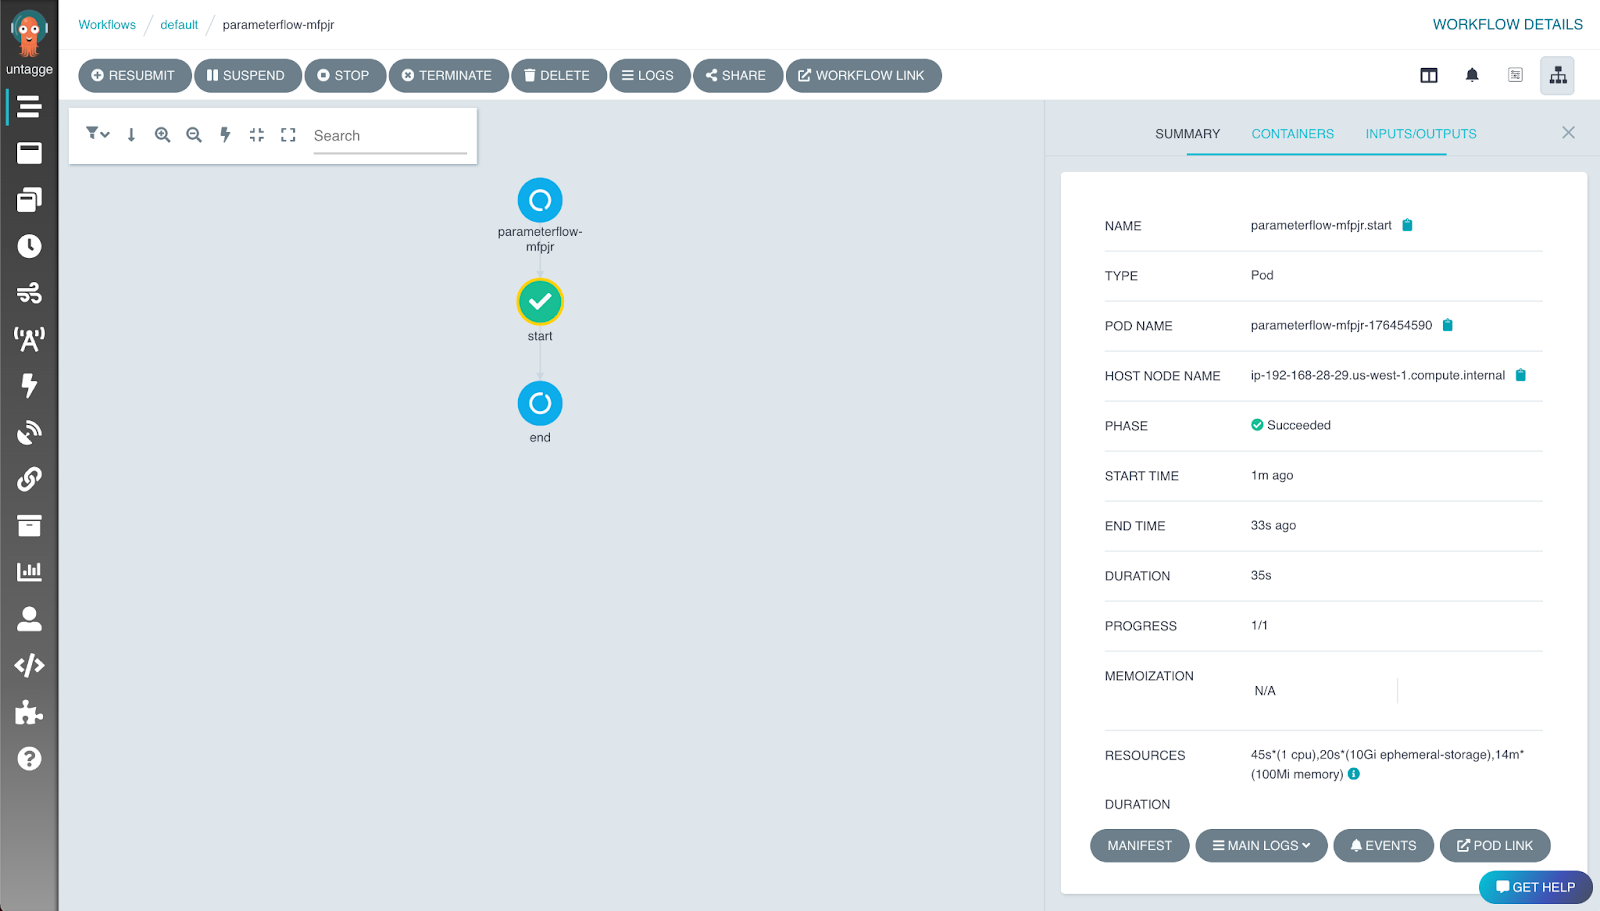
In this case, the run should succeed without problems. If there were errors, you could reproduce them locally as explained in Debugging with Metaflow.
You can trigger the workflow through command line as well:
python parameter_flow.py argo-workflows trigger --alpha 0.5
If you run argo-workflows create again, it will create a new version of your flow on
Argo Workflows. The newest version becomes the production version automatically. If you
want to test on Argo Workflows without interfering with a production flow, you can
change the name of your class, e.g. from ParameterFlow to ParameterFlowStaging, and
argo-workflows create the flow under a new name or use the
@project
decorator.
Note that argo-workflows create creates a new isolated production
namespace for your production flow. Please
read Organizing Results to learn all about namespace behavior.
Limiting the number of concurrent tasks
By default, Metaflow configures Argo Workflows to execute at most 100 tasks concurrently within a foreach step. This should ensure that most workflows finish quickly without overwhelming your Kubernetes cluster, the execution backend.
If your workflow includes a large foreach and you need results faster, you can increase
the default with the --max-workers option. For instance, argo-workflows create
--max-workers 500 allows 500 tasks to be executed concurrently for every foreach step.
This option is similar to run
--max-workers that is used to
limit concurrency outside Argo Workflows.
Deploy-time parameters
Since Metaflow 2.13, Metaflow provides a new construct, Config, that
offer more versatile approach to configuration than deploy-time parameters.
Take a look at Configuring Flows
for more information.
You can customize Argo Workflows deployments through Parameters that are evaluated at
the deployment time, i.e. when argo-workflows create is executed.
For instance, you can change the default value of a Parameter based on who deployed the
workflow or what Git branch the deployment was executed in. Crucially, the function in
Parameter is evaluated only once during argo-workflows create and not during the
execution of the flow.
You can run the flow locally as usual. The function inside Parameter is called only once when the execution starts.
from metaflow import FlowSpec, Parameter, step, JSONType
from datetime import datetime
import json

def deployment_info(context):
    return json.dumps({'who': context.user_name,
                       'when': datetime.now().isoformat()})

class DeploymentInfoFlow(FlowSpec):
    info = Parameter('deployment_info',
                     type=JSONType,
                     default=deployment_info)

    @step
    def start(self):
        print('This flow was deployed at %s by %s'\
              % (self.info['when'], self.info['who']))
        self.next(self.end)

    @step
    def end(self):
        pass

if __name__ == '__main__':
    DeploymentInfoFlow()
When argo-workflows create is called, deployment_info is evaluated which captures
your username and the time of deployment. This information remains constant on Argo
Workflows, although the user may override the default value.
The context object is passed to any function defined in Parameter. It contains various
fields related to the flow being deployed. By relying on the values passed in context,
you can create generic deploy-time functions that can be reused by multiple flows.
Scheduling a flow
By default, a flow on Argo Workflows does not run automatically. You need to set up a trigger to launch the flow when an event occurs. With Argo Workflows, Metaflow supports two kinds of triggering:
- Triggering based on events (using
@triggerand@trigger_on_finish). - Triggering based on time (using
@schedule), described below.
Time-based triggering
Metaflow provides built-in support for triggering Metaflow flows through time-based (cron) triggers. Use a time-based trigger if you want to trigger the workflow at a certain time.
Time-based triggers are implemented at the FlowSpec-level using the @schedule
decorator. This flow is triggered hourly:
from metaflow import FlowSpec, schedule, step
from datetime import datetime

@schedule(hourly=True)
class HourlyFlow(FlowSpec):

    @step
    def start(self):
        now = datetime.now().strftime('%Y-%m-%d %H:%M:%S')
        print('time is %s' % now)
        self.next(self.end)

    @step
    def end(self):
        pass

if __name__ == '__main__':
    HourlyFlow()
You can define the schedule with @schedule in one of the following ways:
@schedule(weekly=True)runs the workflow on Sundays at midnight.@schedule(daily=True)runs the workflow every day at midnight.@schedule(hourly=True)runs the workflow every hour.@schedule(cron='0 10 * * ? *', timezone='Etc/UTC')runs the workflow at the given Cron schedule, in this case at 10am UTC every day.
Reproducing failed production runs
Let's use DebugFlow from the debugging
section as an example. The flow
contains a bug in the step b. When you run it, the failed run will look like this on
the Argo Workflows UI:
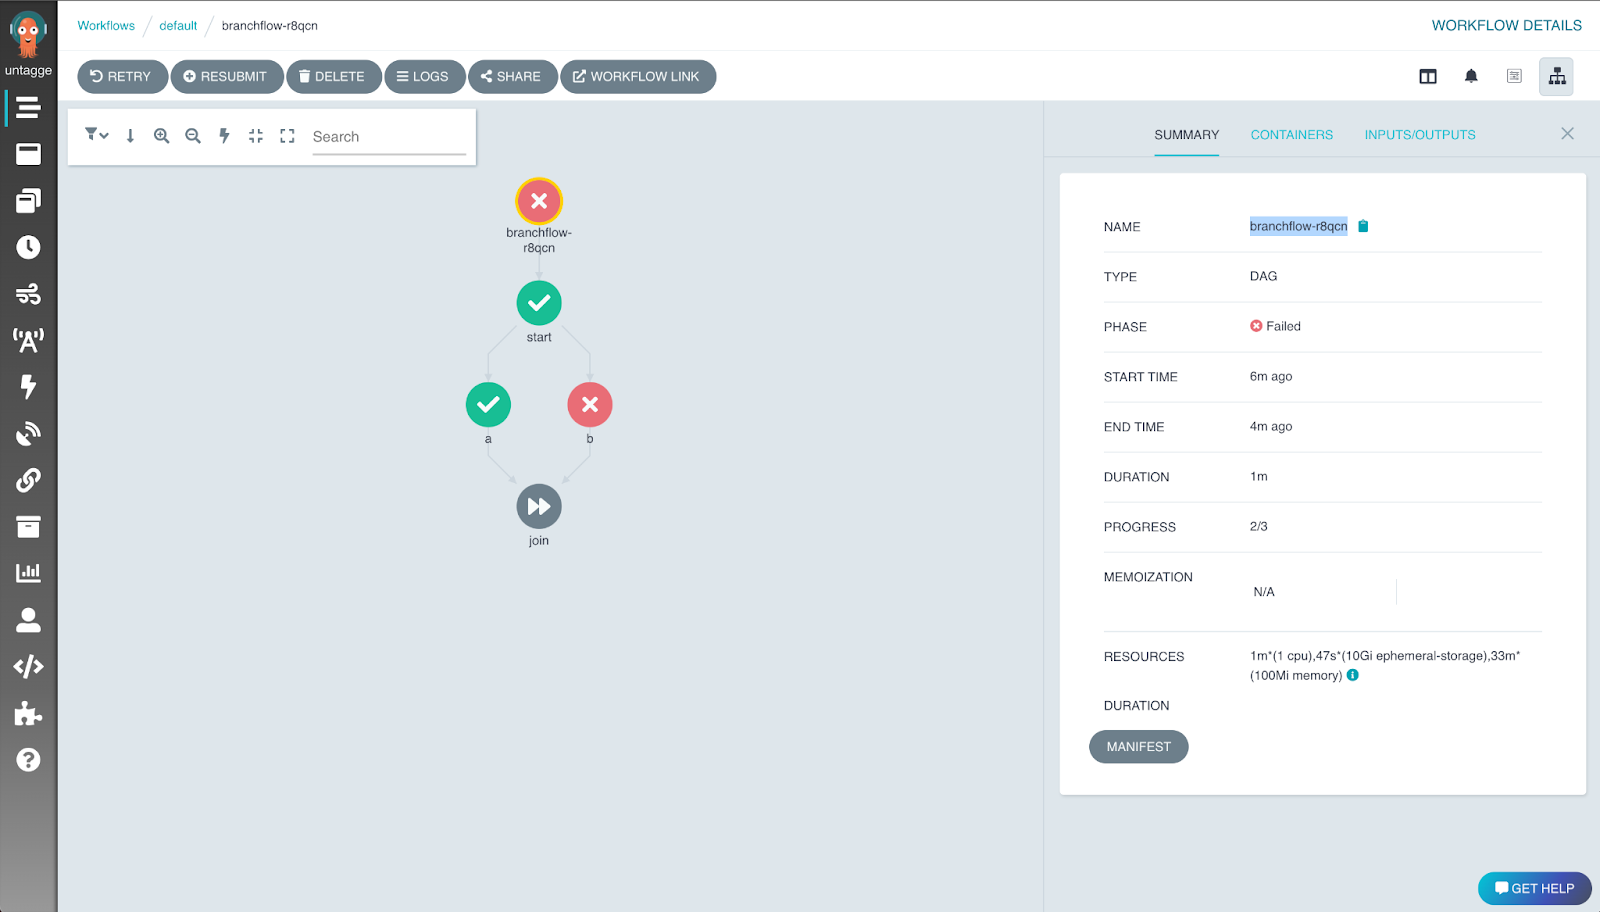
Notice the execution ID of branchflow-r8qcn. When running on Argo Workflows, Metaflow
uses the Argo Workflows workflow execution name (prefixed with argo-) as the run id.
The graph visualization shows that step b failed, as expected. First, you should
inspect the logs of the failed step to get an idea of why it failed. You can access
Kubernetes step logs in the Argo Workflows UI by selecting the failed task and clicking
on the logs button.
Next, we want to reproduce the above error locally. We do this by resuming the specific Argo Workflows run that failed:
python debug.py resume --origin-run-id argo-branchflow-r8qcn
This will reuse the results of the start and a step from the Argo Workflows run. It
will try to rerun the step b locally, which fails with the same error as it does in
production.
You can fix the error locally as above. In the case of this simple flow, you can run the
whole flow locally to confirm that the fix works. After validating the results, you
would deploy a new version to production with argo-workflows create.
However, this might not be a feasible approach for complex production flow. For instance, the flow might process large amounts of data that can not be handled in your local instance. We have better approaches for staging flows for production:
Staging flows for production
The easiest approach to test a demanding flow is to run it with Kubernetes. This works even with resume:
python debug.py resume --origin-run-id argo-branchflow-r8qcn --with kubernetes
This will resume your flow and run every step on Kubernetes. When you are ready to test a fixed flow end-to-end, just run it as follows:
python debug.py run --with kubernetes
Alternatively, you can change the name of the flow temporarily, e.g. from DebugFlow to
DebugFlowStaging. Then you can run argo-workflows create with the new name, which will
create a separate staging flow on Argo Workflows. You can also use the
@project
decorator.
You can test the staging flow freely without interfering with the production flow. Once the staging flow runs successfully, you can confidently deploy a new version to production.
Notifications on flow success or error
On Argo Workflows we support sending notifications on a successful or failed flow. To enable notifications, supply the --notify-on-success/--notify-on-error flags while deploying your flow. You must also configure the notification provider. The ones currently supported are
Custom notifications
New in Metaflow 2.16
You can set up a custom function to be called on success or failure on Argo Workflows using exit hooks.
Slack notifications
In order to enable Slack notifications, we need to first create a webhook endpoing that Metaflow can send the notifications to by following the instructions at https://api.slack.com/messaging/webhooks
When this is done, a flow can be deployed with
python debug.py --notify-on-success --notify-on-error --notify-slack-webhook-url url-that-we-created
PagerDuty notifications
For notifications through PagerDuty, we need to generate an integration key by following the instructions at https://support.pagerduty.com/docs/services-and-integrations#create-a-generic-events-api-integration
Then the flow can be deployed with
python debug --notify-on-success --notify-on-error --notify-pager-duty-integration-key key-that-we-generated
Incident.io alerts
For notifications through Incident.io, we need to create an alert source configuration HTTP endpoint. After creating this, grab the provided authorization token, and the alert source config ID as we will need these when deploying our flow.
Once you have gathered all the necessary information, the flow can be deployed with
python debug.py argo-workflows --notify-on-success --notify-on-error --notify-incident-io-api-key token --incident-io-alert-source-config-id source-config-id
Metaflow sets the following metadata for the alert payload so that the consumption can be customized on the Incident.io side.
{
    "metadata": {
        "run_status": "failed or succeeded",
        "flow_name": "HelloFlow"
        "run_id": "run-123"
    }
}