Effortless Task Inspection with Default Cards
Metaflow comes with a built-in Default Card that shows all artifacts produced by a task. Let’s create a simple flow to test it.
from metaflow import FlowSpec, Parameter, step, card
from datetime import datetime

class DefaultCardFlow(FlowSpec):

    alpha = Parameter('alpha', default=0.5)

    @card
    @step
    def start(self):
        self.example_dict = {'first_key': list(range(10)),
                             'second_key': {'one', 'two'}}
        self.timestamp = datetime.utcnow()
        self.next(self.end)

    @step
    def end(self):
        pass

if __name__ == "__main__":
    DefaultCardFlow()
The only new feature introduced in this flow is the @card decorator which attaches a
card to the start step. Since no arguments are given to the decorator, the Default
Card is used. Save the example in defaultcard.py and execute the flow as usual:
python defaultcard.py run
After the run has finished, you can open a generated card on the command line:
python defaultcard.py card view start
The command will open the card in your web browser. It will look like this:
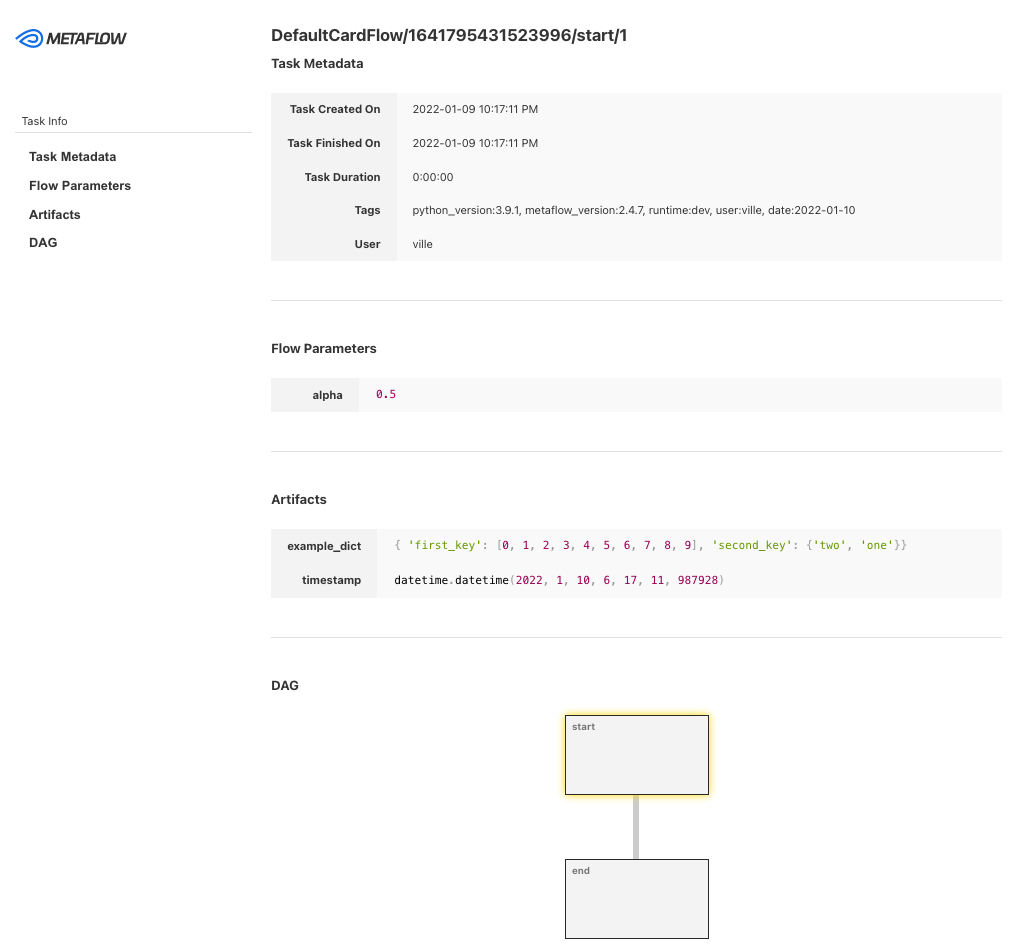
The Default Card shows basic metadata about the task, parameters given for the flow, artifacts accessible in the task, as well as a visualization of the flow DAG. You can use this information to quickly observe and verify results of a task without making any changes in the code.
Using Local Card Viewer
Local Card Viewer was introduced in Metaflow 2.11. Make sure you have a recent enough version of Metaflow to use this feature.
Opening a card manually after each run with card view can get tedious. If you
have access to Metaflow UI, you can view cards automatically in the UI. If you
don't have the UI deployed, Metaflow provides a simple built-in viewer, Local
Card Viewer, which sets up a local server for viewing cards.
Open a new terminal, navigate to the same working directory where you will be executing flows, and run this command
python defaultcard.py card server
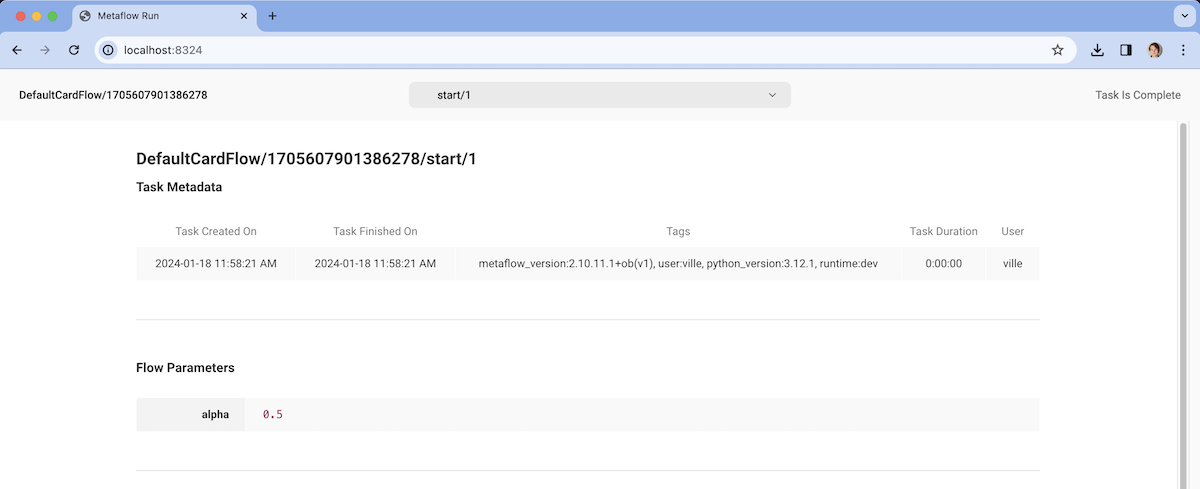
In your browser, go to localhost:8324. You should see the latest card created with a header that allows you to navigate through all cards produced by the latest run:
If you run the flow again
python defaultcard.py run
the viewer updates automatically to show the latest card. This way, you can keep the viewer
open on the side, as you develop your flows in another window. Importantly,
the local viewer allows you to view updating cards in real-time,
similar to Metaflow UI, while the card view command only shows a card that was
available at the time when you executed the command.
Developing Cards Quickly with spin
You can develop cards quickly by using the
spin command together with the local
card viewer, as shown in this short video:
Run the local card viewer in a terminal using --mode spin to watch
ephemeral spin results instead of the standard, persistent cards:
python defaultcard.py --mode spin card server
You can then use spin in another terminal to iterate on a step, viewing the results as cards in real time. Build the card content incrementally by adding artifacts and
card components, and quickly inspect your progress by running spin after each change.
Visualizing Artifacts with the Default Card
As shown in the screenshot above, the artifacts table shows all Metaflow artifacts related to the task. Large artifacts are truncated for display - you can access the originals using the Client API.
If an artifact contains an image or a dataframe, the artifact is visualized in a
separate section in addition to its string representation. Take a look at the following
example which contains an artifact, self.image storing an animated GIF and another
artifact, a Pandas dataframe:
from metaflow import FlowSpec, Parameter, step
import requests, pandas, string

URL = "https://upload.wikimedia.org/wikipedia/commons/4/45/Blue_Marble_rotating.gif"

class FancyDefaultCardFlow(FlowSpec):

    image_url = Parameter('image_url', default=URL)

    @step
    def start(self):
        self.image = requests.get(self.image_url,
                                  headers={'user-agent': 'metaflow-example'}).content
        self.dataframe = pandas.DataFrame({'lowercase': list(string.ascii_lowercase),
                                           'uppercase': list(string.ascii_uppercase)})
        self.next(self.end)

    @step
    def end(self):
        pass

if __name__ == "__main__":
    FancyDefaultCardFlow()
To demonstrate how cards can be attached to runs on the fly, this example doesn’t
include the @card decorator in the code. Save the code to fancydefaultcard.py and
run it as follows:
python fancydefaultcard.py run --with card
Note that the example expects that you have the requests and pandas libraries
installed. The --with card option attaches a @card decorator to every step without
changes in the code. You can execute any existing flow --with card to inspect its
results visually.
You use the local viewer to see the card or open the card manually:
python fancydefaultcard.py card view start
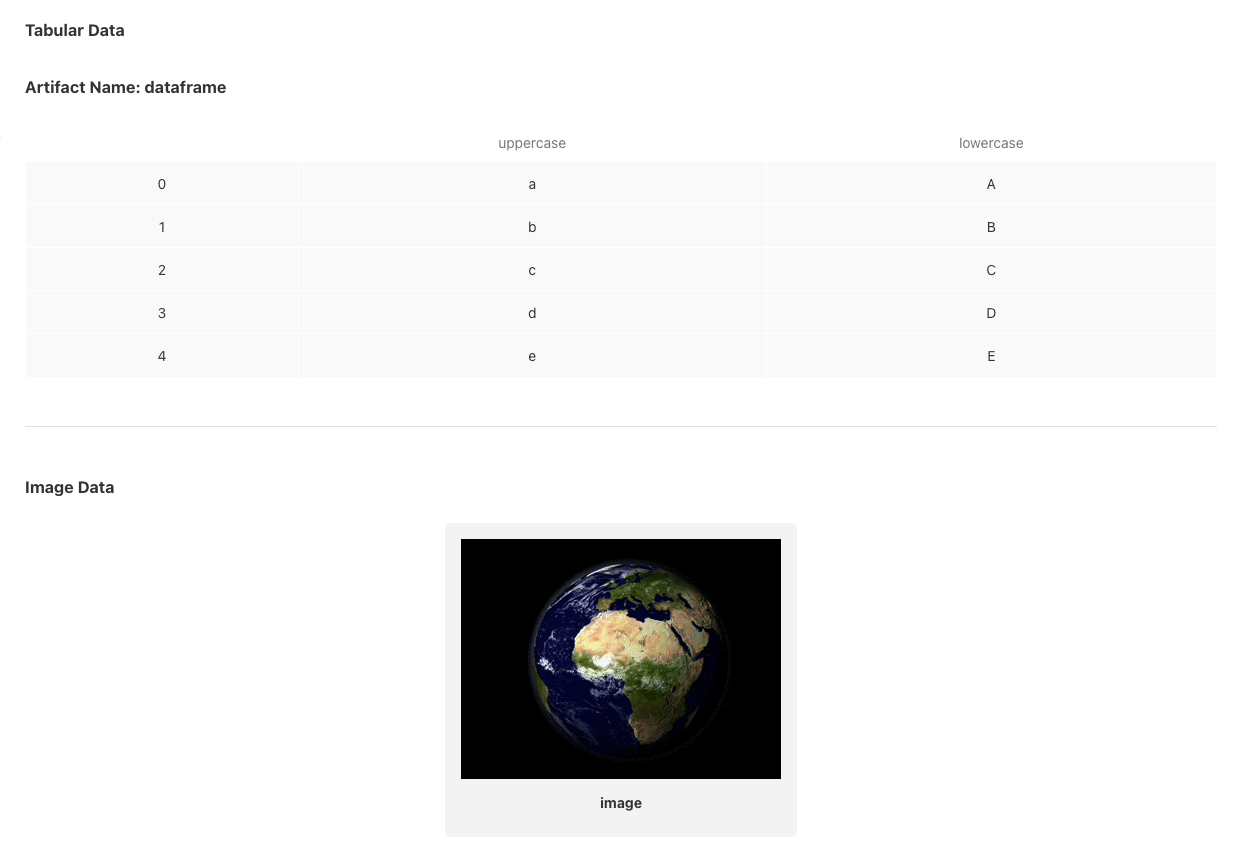
You will see additional sections in the card which visualize dataframe as a table and
show the image stored in the image artifact.
Cards come with a built-in component, VegaChart, for creating charts and plots,
but using the above pattern you can use any other visualization library and store
the resulting image in an artifact for easy viewing.
Cards Are Stored And Versioned Automatically
A major benefit of @card is that reports produced by it are versioned and stored in
the Metaflow datastore automatically, alongside their parent task. This way, you or
your colleagues can easily access any historical card, e.g. a model scorecard associated
with a particular version of the model.
All past cards are viewable in the Metaflow UI but you can also access any historical card on the command line by using a run ID of a past run. For instance
python fancydefaultcard.py card view 1638257165470922/start
In the case of foreach, a single step can produce multiple tasks and cards. You can view an individual card by giving a full task ID (aka pathspec) corresponding to a task:
python fancydefaultcard.py card view 1638257165470922/start/1
You can see all available cards in the latest run with the card list command:
python fancydefaultcard.py card list
It is possible to produce multiple separate cards from a single task by adding multiple
@card decorators in a step, which are all shown by card list. To make it easier to
identify specific cards, you can also assign them a unique ID, as described in Multiple
Cards In a Step.
Accessing Cards via an API
Besides the Metaflow UI and the command line interface, you can access and view cards programmatically through an API. This is particularly convenient, if you want to access cards, say, in a Jupyter notebook.
Given a Task ID (a pathspec), or a Task object from the Client API, the
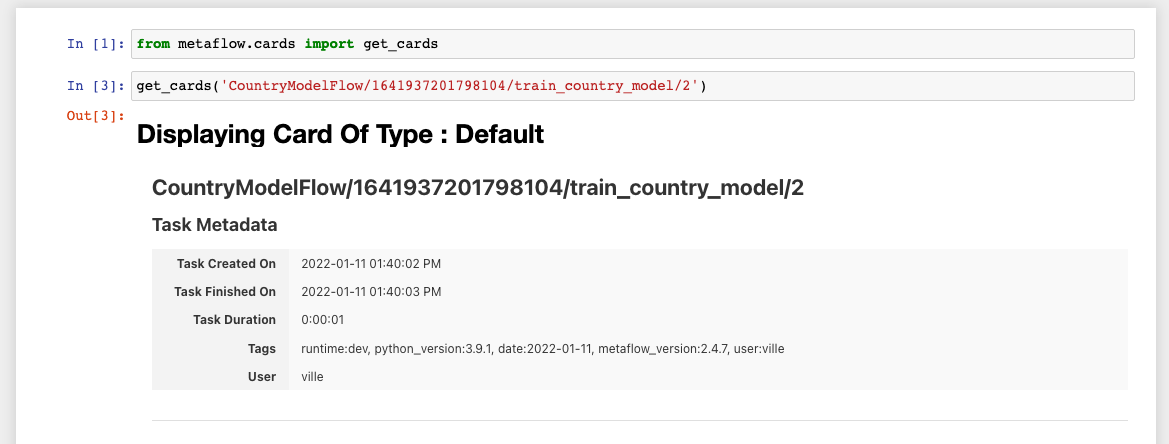
get_cards function lists all cards of the task. You can try this in a notebook cell.
Replace the Task ID with an actual ID from a previous run:
from metaflow.cards import get_cards
get_cards('CountryModelFlow/1641937201798104/train_country_model/2')
This will show the card in the output cell:
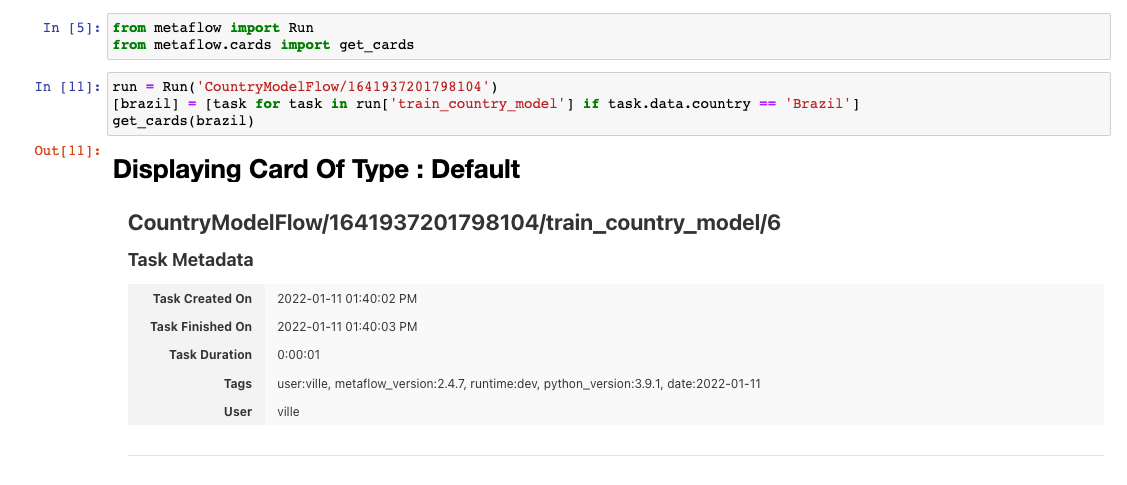
The get_cards function works well in conjunction with the Client API. For
instance, you can use the Client API to search for a task with a specific artifact and
view its card:
run = Run('CountryModelFlow/1641937201798104')
[brazil] = [task for task in run['train_country_model']
            if task['country'].data == 'Brazil']
get_cards(brazil)
Sharing Cards
Since cards are self-contained HTML files, they can be easily shared and viewed by anyone without having to install additional software. To share a card, first save the desired card to a file:
python fancydefaultcard.py card get start mycard.html
Use the card get command to save the HTML without opening it in a browser. You can
attach the resulting card file, here mycard.html, say, in an email or a Slack message.
If you want to share reports automatically e.g. via email, you can use the get_cards
API discussed above to obtain the HTML programmatically.
Some recipients may prefer a PDF file over HTML. In this case, you can simply choose “Print” in your browser followed by “Save as PDF”.